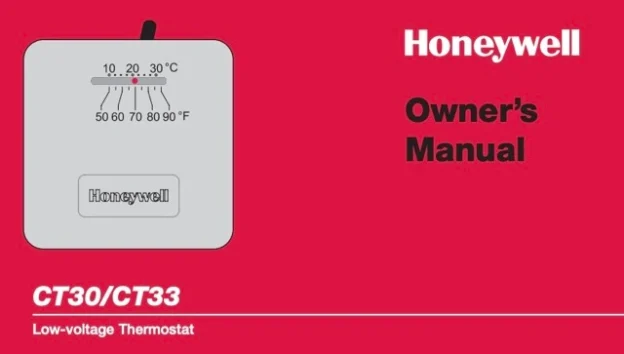
This page walks through the Honeywell CT30 Low-voltage Thermostat Owner’s Manual (document 69-1808EF). The CT30 is a simple heat-only, non-programmable thermostat that runs on two wires, so the setup is short: check that it matches your system, mount the base, set one adjustment lever, and connect two wires. The steps below are taken from the manual and noted with their page, and the owner’s manual PDF is linked here. Turn off power before you begin.
Download Honeywell CT30 Owner’s Manual (PDF)
Table of Contents
- What the CT30 Is
- Is It the Right Thermostat? Count the Wires
- What’s in the Box and What You Need
- Installation Steps
- Wiring the CT30
- Setting the Adjustment Lever
- Operating the CT30
- Specifications and Support
- FAQ
What the CT30 Is
The CT30 is a low-voltage, heat-only, non-programmable thermostat. You set the temperature by moving a lever, and there are no schedules or buttons to program (pp.1,6). The same manual also covers the CT33, which is similar but adds a far-left lever position to turn the system off (p.6). Both are simple replacements for an existing two-wire heat thermostat.
Is It the Right Thermostat? Count the Wires
Before installing, the manual has you count wires. Look at the wires attached to your old thermostat’s terminals, but do not count any wire on a C or C1 terminal (p.2):
- Two wires: proceed with the installation.
- Three or more wires: the CT30 may not be compatible. Stop and call Honeywell at 1-800-468-1502 for advice.
In short, the CT30 is for a basic heat-only circuit. It has terminals only for power and heat, so a system with a cooling wire (Y), a fan wire (G) or a separate cooling transformer (Rc) is not a match.
What’s in the Box and What You Need
The package should include the CT30 thermostat, a cover plate, two wall anchors and screws, a caution card, and wire labels. Tools the manual lists (p.1): a screwdriver, a hammer, a pencil, a drill bit (3/16-inch for drywall, 7/32-inch for plaster), and an optional level.
Installation Steps
- Turn off power at the heating system or the fuse/circuit-breaker panel. Take off the old cover and thermostat but leave the wallplate and wires in place (p.2).
- Check for mercury. If the old thermostat has a sealed tube with mercury, do not bin it; follow the Mercury Notice and your local disposal rules (p.2).
- Label and remove. Disconnect the wires one at a time and wrap each with the matching letter label. Ignore wire colors and use only the terminal letters. Remove the old wallplate once every wire is labeled (p.3).
- Mount the base. Mark the screw holes, drill (3/16-inch drywall, 7/32-inch plaster), tap in the anchors, and feed the wires through the base (pp.3,4).
- Connect the wires (see Wiring below), then set the adjustment lever (see below) and restore power (pp.4,5).
Wiring the CT30
Match each labeled wire to the terminal with the same letter, loosen the screw, wrap the bare wire around the terminal, and tighten (p.4). The CT30 has two terminals.
| Terminal | Accepts these old-thermostat letters |
|---|---|
| R | R, RH, 4 or V |
| W | W, W1 or H |
If the old thermostat has a Y, G or Rc wire, the manual says to stop: this heat-only thermostat cannot use those, so it is the wrong model for that system (p.4). Any unused wire should be capped with tape and kept out of the wall opening.
Setting the Adjustment Lever
On the CT30, separate the cover from the body, remove the plastic insert, and use a pencil to move the adjustment lever to the setting for your heating system. This tunes how the thermostat cycles to your equipment (p.5):
| Your system | Lever setting |
|---|---|
| Gas or oil furnace, less than 90% efficiency | 0.4 |
| Electric furnace (any type) | 0.3 |
| High-efficiency furnace, more than 90% | 0.8 |
| Hot water system | 0.8 |
| Gas or oil steam or gravity system | 1.2 |
Then align the three cover tabs with the slots and press until the cover snaps in, and restore power (p.5).
Operating the CT30
Operation is manual. Move the lever to raise or lower the desired indoor temperature; there is nothing to program (p.6). On the CT33, moving the lever to the far left turns the heating system off (p.6).
Specifications and Support
- Type: low-voltage, heat-only, non-programmable thermostat.
- Control: manual lever for temperature; a set adjustment lever for the furnace type.
- Connection: two-wire hook-up (R and W).
- Not for: systems with cooling, a fan wire, or three or more wires.
- Related model: CT33, same guide, with an off position.
- Warranty: 1-year limited; Honeywell Customer Care 1-800-468-1502, www.honeywell.com/yourhome (pp.7,8).
For exact dimensions and the wiring diagrams, use the manual; they are shown as figures rather than a spec list.
FAQ
Is the CT30 a programmable thermostat?
No. It is a non-programmable, heat-only model. You set the temperature by moving a lever, and there are no schedules to program.
How many wires does the CT30 need?
Two, not counting any C or C1 wire. If your old thermostat has three or more, the CT30 is probably not the right fit.
Can the CT30 control air conditioning or a fan?
No. It only has R and W terminals. A Y, G or Rc wire means you need a different thermostat.
What does the adjustment lever do?
It matches the thermostat to your furnace type. The manual gives values from 0.3 (electric) to 1.2 (steam or gravity), with 0.4 for a standard gas or oil furnace (p.5).
What is the difference between the CT30 and CT33?
Both are covered by the same guide. The CT33 adds a far-left lever position that turns the heating system off; the CT30’s distinguishing step is the adjustment-lever setting.