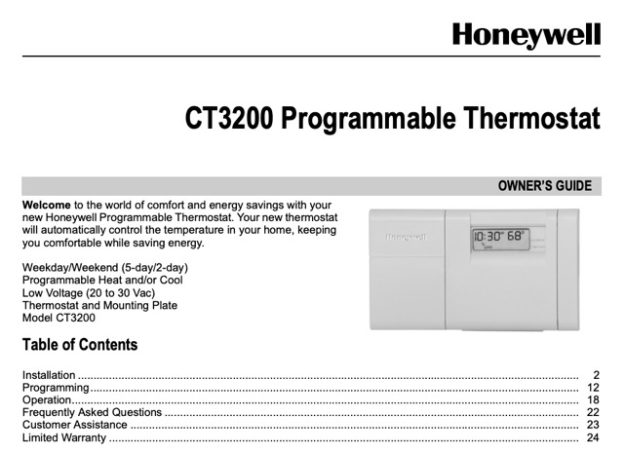
This page summarizes the Honeywell CT3200 programmable thermostat Owner’s Manual (Owner’s Guide 69-1631) so you can install, program and fix this weekday/weekend thermostat without hunting through the PDF. The CT3200 is a 5-2 day programmable model for a single-stage heating and/or cooling system, and it is not the same as a 7-day thermostat. Every step below is drawn from the official document and noted with its section, and the manual PDF is linked here. Check it against your own system before you touch any wiring.
Download Honeywell CT3200 Owner’s Manual (PDF)
Table of Contents
- What the CT3200 Is
- Is the CT3200 Right for Your System?
- Before You Install
- Wiring the CT3200
- Programming the Weekday/Weekend Schedule
- Controls You Use Every Day
- Resetting the Thermostat
- Troubleshooting (From the Manual)
- Specifications
- FAQ
What the CT3200 Is
The CT3200 is a digital, wall-mounted, low-voltage (20 to 30 VAC) programmable thermostat for a home’s heating and/or cooling system. Honeywell’s own description of it:
- Weekday/Weekend (5-2 day) programming. One schedule for Monday to Friday and a separate one for Saturday and Sunday.
- Four periods per day. Wake, Leave, Return and Sleep, each with its own temperature.
- Heat and/or Cool control. It runs a single stage of heating and a single stage of cooling.
- Two AA alkaline batteries. They back up the clock and program; the unit is powered by your low-voltage system.
Because it is a single-stage thermostat, it is not for multistage or variable-speed systems. Honeywell’s compatibility table lists alternate models if yours does not fit.
Is the CT3200 Right for Your System?
The Owner’s Guide starts with a compatibility check, because a programmable thermostat only works on the systems it is designed for (Step 1: Identify your system). It suits conventional 24-volt systems, including:
- Single-stage warm-air furnace, with or without central air conditioning.
- Hot-water or steam heat with a single stage.
- Central cooling on a matching 24V system.
- Heat pumps with single-stage heating and no electric auxiliary heat.
The guide then calls out cases that need attention before you install (Special wiring): a three-wire heating-only system, five-wire systems, and leftover wires not connected to the old thermostat. If your setup matches one of those, follow the guide’s special instructions or call a heating contractor; do not guess at the terminals.
To confirm the CT3200 is a fit, use the manual’s compatibility table. If the table points to a different model for your system, do not install this one.
Before You Install
The manual’s installation sequence begins with safety. Follow it in order (Step 1 and Step 2):
- Turn off power to the heating/cooling system at the furnace switch or the fuse/circuit-breaker panel.
- Remove the old thermostat’s cover and mounting plate without disconnecting the wires.
- Inspect the wiring. If the old thermostat has a C or C1 terminal wire, six or more wires, exactly three wires, five wires, or loose unused wires, stop and use the guide’s special-wiring instructions.
- Label each wire with the letter of the terminal it connects to on the old thermostat, using the enclosed labels. Label by terminal letter, not by wire color.
If your old thermostat contains mercury, the guide requires you to recycle it rather than place it in household trash (Mercury Notice).
Wiring the CT3200
The CT3200 has five terminals and does not use C. The table matches the manual’s wiring diagram (Step 7). Connect each labeled wire to the terminal with the same letter.
| Terminal | What it does |
|---|---|
| R | 24V power for heating |
| Rc | 24V power for cooling |
| W | Heat call |
| Y | Cool call |
| G | Fan |
The guide also notes:
- C terminal. This thermostat does not use the C wiring terminal. If a C or C1 wire is present, tape it off and keep it clear of the new unit.
- R/Rc jumper. A metal jumper is pre-installed between R and Rc. On a single-transformer system leave it; on a five-wire system (separate heating and cooling power), remove the jumper and run each power wire to its own terminal.
- Old terminals that do not match. The guide includes a cross-reference table so wires from old terminals such as R, Rh, 4 or V map correctly to the new R and Rc. Use that table instead of assuming.
Programming the Weekday/Weekend Schedule
The CT3200 stores two schedules: a weekday set (Monday to Friday) and a weekend set (Saturday and Sunday), each with four periods. Heating and cooling are programmed separately, so set the System switch to Heat for the heating program and Cool for the cooling program. The general flow from the guide is:
- Press PROGRAM to start, then advance to the period you want (Wake, then Leave, Return and Sleep).
- Set the period’s time, then set its temperature.
- Repeat for each period. When a period is left blank, the thermostat uses the previous period’s temperature.
- Move between the weekday and weekend schedules. Once the first schedule is set, the guide lets you copy it to the next day or period to save time.
- Press RUN to save and return to normal operation.
The guide prints suggested start times and temperatures. For cooling they are Wake 6:00 AM 78°F (25.5°C), Leave 8:00 AM 85°F (29.5°C), Return 6:00 PM 78°F (25.5°C) and Sleep 10:00 PM 82°F (28°C); a parallel table gives the heating suggestions. Shift the numbers to your own day.
Controls You Use Every Day
- System switch. Set to Heat, Cool or Off.
- Fan switch. Set to Auto (fan runs only during heating or cooling) or On (fan runs continuously).
- Raised or lowered temperature. Press the up/down arrows to change the current setting; this places the thermostat in a temporary hold until the next scheduled period, then the program resumes.
- Permanent hold. To keep a temperature indefinitely, press and hold as the guide describes; press RUN to return to the schedule.
- Check programs. Press PROGRAM repeatedly to review the times and temperatures you set; press RUN when done.
When the thermostat is actively calling for heating or cooling, the display shows a SYSTEM ON arrow.
Resetting the Thermostat
For a blank or confused display, the guide’s FAQ gives a reset rather than a button combination: set the System switch to Off, remove the batteries, then insert them backward (reversed polarity) for five to ten seconds and reinstall them the correct way. The display should come back on and you will need to set the time, day and schedule again. This is the manual’s stated reset method for this model.
Troubleshooting (From the Manual)
This is the “If… Then…” list from the guide’s Frequently Asked Questions (pp.22–23). Run through it before assuming the thermostat is bad.
| Problem | What the manual says to do |
|---|---|
| Display does not come on | Make sure the batteries are fresh and installed correctly; if not, use the reversed-battery reset. |
| “bAt Lo” flashes | Batteries are low. Replace them; if it still appears, do the reversed-battery reset. |
| Setpoint will not go below 45°F (7°C) or above 88°F (31°C) | You have reached the programming limit; the range is 45°F to 88°F. |
| Temperature changes at the wrong times | Check the AM/PM and the day/time for that period and reprogram if needed. |
| Heat does not come on | Set System to Heat; check the fuse/breaker and connections; if blank or “bAt Lo”, replace batteries; allow time for the furnace to start. |
| Cool does not come on | Set System to Cool; check fuse/breaker and connections; the thermostat has a built-in delay, so allow 5 to 10 minutes before the AC starts. |
| House too warm or too cool | Press RUN/PROGRAM to check the current setpoint and change it if needed. |
| Furnace short-cycles | Adjust the anticipator screws on the back of the thermostat (heat anticipator per the guide). |
| Display differs from setting by more than about 1° | Seal the wall wire hole to stop drafts; some difference is normal, and during recovery setting and room temperature can differ for up to 30 minutes. |
Specifications
- Programming: Weekday/Weekend (5-2 day), four periods per day (Wake, Leave, Return, Sleep).
- System control: Single-stage heat and/or cool; 24V low-voltage systems (20 to 30 VAC).
- Setpoint range while programming: 45°F to 88°F (7°C to 31°C).
- Cooling delay: built-in compressor protection of about 5 to 10 minutes.
- Power: System-powered; two AA alkaline batteries back up clock and program.
- Terminals: R, Rc, W, Y, G; C is not used.
- Not compatible with: multistage or variable-speed systems, and millivolt (750 mV) gas-fire systems unless the compatibility table says otherwise.
- Warranty: 1-year limited (excludes battery). Honeywell Customer Care 1-800-468-1502.
For exact dimensions and mounting, use the manual; they are not printed as a spec in the Owner’s Guide.
FAQ
Is the CT3200 a 7-day programmable thermostat?
No. It is a weekday/weekend (5-2 day) model: one schedule for Monday to Friday and a separate one for the weekend, with four periods each day.
Does the CT3200 need a C wire?
No. The guide states this thermostat does not use the C terminal. If a C or C1 wire is present, tape it off.
How many batteries does it use?
Two AA alkaline batteries. They preserve the clock and program. A flashing “bAt Lo” means they are low.
How do I reset a CT3200 with a blank display?
Set the System switch to Off, take out the batteries, insert them backward for five to ten seconds, then reinstall them the correct way and reset the time, day and schedule.
Why is the air conditioner slow to start?
The CT3200 has a built-in compressor delay; the manual tells you to allow 5 to 10 minutes after changing the setting before the cooling starts.
What temperature range can I set while programming?
Between 45°F (7°C) and 88°F (31°C); the display will not go beyond those limits during setup.