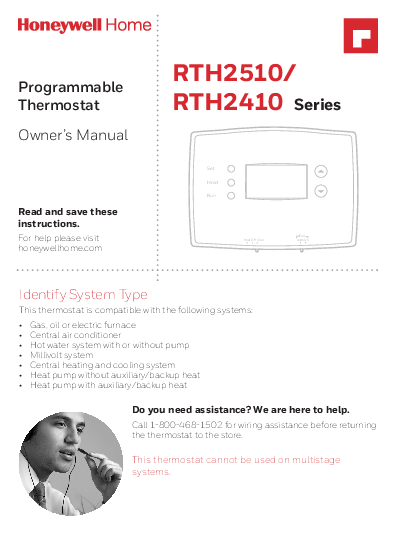
You’ve got an RTH2510B on the wall and you need to wire it, set the schedule, or figure out why the display is blank. This guide covers the installation, programming, and troubleshooting steps from the official Honeywell owner’s manual, with a PDF download at the bottom.
What is the RTH2510B?
The RTH2510B is Honeywell’s wired 7-day programmable thermostat for standard 24-volt heating and cooling systems. It comes in the same series as the RTH2410B, which is the cheaper 5-1-1 model (one schedule for weekdays, one for Saturday, one for Sunday). The RTH2510B lets you set a different program for every day of the week, which matters if your weekends don’t look like your weekdays.
What you get, per the manual:
- Backlit display that shows the room temperature at all times
- Four periods per day: Wake, Leave, Return, Sleep
- Temporary and permanent hold to override the schedule
- Early Start: the heat or AC kicks in before the scheduled time so the room hits your target exactly when you want it
- A 5-minute compressor protection delay that prevents short-cycling
- Runs on two AAA batteries, so the schedule survives a power outage
What it works with (and what it doesn’t)
Systems it works with
The manual lists these as compatible:
- Gas, oil, or electric furnace
- Central air conditioner
- Hot water system with or without pump
- Millivolt systems (wall furnaces, gas fireplaces)
- Central heating and cooling
- Heat pump without auxiliary/backup heat
- Heat pump with auxiliary/backup heat (requires Advanced Installation setup, below)
What it doesn’t work with
The manual is explicit about two things this thermostat can’t handle:
- Multistage systems (two-stage compressors, variable-speed air handlers)
- Line-voltage systems (120V/240V baseboard heaters, electric radiators). The thermostat runs on 24V or 750mV, not 120/240V.
No C-wire needed. This thermostat runs on batteries. If you happen to have a spare C wire in the wall, cap it with a wire nut and tuck it away. The installation guide explicitly says “do not use C or X.”
Before you touch any wires
- Label every wire before you pull it. Stick a small piece of tape on each wire with the terminal letter it came from: R, Rh, Rc, W, Y, G, B, O. Wire colors are not a standard. The letters are what matter.
- Check whether you have a heat pump. If you see wires going to both O and B terminals, you’ve got a heat pump. The RTH2510B handles basic heat pumps, and it can also run a heat pump with auxiliary/backup heat strips — but you have to tell the thermostat what system you have in the Advanced Installation menu (see below).
- Mount the wallplate. Run the wires through the center hole, level it, and drive the screws.
- Don’t run AC below 50°F outside. The manual spells this out as an equipment-damage hazard. The compressor can be hurt if you run the cooling system when it’s colder than 50°F (10°C) outdoors.
Wiring the RTH2510B
For a conventional (non-heat-pump) system, match your labeled wires to the terminals below.
| Terminal | Typical color* | What it does |
|---|---|---|
| R / Rh | Red | 24V hot, heating transformer |
| Rc | Red | 24V hot, cooling transformer |
| W / AUX | White | Heating relay. Doubles as the auxiliary/backup heat terminal on heat-pump systems. |
| Y | Yellow | Compressor contactor. On heat-pump systems without aux heat, a factory jumper ties Y and W together. |
| G | Green | Fan relay |
| B / O | Blue / Orange | Heat pump reversing valve. Connect to whichever matches your system; don’t use both. |
| C / X | — | Not used. Tape off and tuck away. |
* Colors are a rough guide. Always wire by the terminal label, not the wire color.
The R/Rc jumper
The thermostat ships with a small metal jumper connecting R and Rc. Leave it in place if you have just one red wire. If you’ve got two red wires (one on R, one on Rc), pull the jumper out before inserting both.
Once the wires are in, give each one a gentle tug to make sure it’s seated. Push the extra wire back into the wall, snap the thermostat onto the wallplate, and flip the breaker back on.
The Fan Operation switch
On the back of the thermostat there’s a small switch. Set it to Gas or Oil for forced-air furnaces where the fan comes on with the call for heat. Set it to Electric or Heat Pump if the thermostat controls the fan directly through the G terminal.
Telling the thermostat what system you have
This is the step most people miss. After wiring, you have to enter the Advanced Installation menu so the thermostat knows whether it’s controlling a conventional furnace, a heat pump without aux heat, or a heat pump with backup strips:
- Hold down the Set button and both the Up and Down arrows at the same time for about 5 seconds, until the display changes.
- Function 1 picks the system type: 0 = gas/oil/electric heat with central AC (or heat pump without aux); 1 = heat pump with auxiliary/backup heat.
- Function 5 picks the heat source: 5 = gas/oil forced air; 6 = electric furnace; 3 = heat pump or hot water.
- You can also set Early Start on/off (Function 13), °F vs °C (Function 14), compressor protection on/off (Function 15), and the filter-change reminder (Function 21).
- Press Run to save and exit. Changes also save automatically after 60 seconds with no button press.
If you have a heat pump with backup heat and you skip this step, the emergency heat strips won’t work when they’re supposed to.
Setting up the 7-day schedule
The thermostat comes pre-loaded with energy-saving settings, so it’ll work out of the box. But you’ll want to adjust the times to match your actual routine.
Default factory schedule
| Period | Time | Heat | Cool |
|---|---|---|---|
| Wake | 6:00 AM | 70°F | 78°F |
| Leave | 8:00 AM | 62°F | 85°F |
| Return | 6:00 PM | 70°F | 78°F |
| Sleep | 10:00 PM | 62°F | 82°F |
Programming steps
- Flip the SYSTEM switch to Heat or Cool first. You have to program heating and cooling separately.
- Press SET until the display says “Set Schedule.”
- The Wake time flashes. Use Up/Down to set it, then press SET.
- The Wake temperature flashes. Set it, press SET.
- Repeat for Leave, Return, and Sleep.
- When you finish a day, the display jumps to the next day. Keep going until you’ve set every day you want to customize.
- Press RUN to save and exit.
An example workweek schedule
| Period | Time | Heat (winter) | Cool (summer) |
|---|---|---|---|
| Wake | 6:30 AM | 68°F | 76°F |
| Leave | 8:00 AM | 60°F | 85°F |
| Return | 5:30 PM | 70°F | 76°F |
| Sleep | 11:00 PM | 62°F | 78°F |
Buttons and switches you’ll use daily
Heat / Cool / Off
The SYSTEM switch on the side picks the mode. Heat calls for warmth below setpoint, Cool calls for AC above setpoint, Off shuts everything down.
Temporary hold
Tap Up or Down to nudge the temperature. The screen shows “Temporary” and the current period flashes. This override only lasts until the next scheduled period, then it goes back to the program.
Permanent hold
Press HOLD to lock in one temperature indefinitely. Useful on vacation days or when you’re home sick. Press RUN when you want the schedule back.
“Cool On” flashing
Don’t panic. That’s the 5-minute compressor protection delay. The AC will start once the timer runs out. It’s there so the compressor doesn’t short-cycle, which is what kills compressors early.
Batteries
Two AAA alkalines. When “Lo Batt” starts flashing, you’ve got about 60 days before they die. Change them once a year, or before any trip longer than a month. Always flip SYSTEM to Off before pulling the batteries. The clock and day will need re-setting, but your programmed temperatures are stored permanently.
Troubleshooting
| Problem | Likely cause | Fix |
|---|---|---|
| Display is blank | Furnace door not closed; dead batteries | Make sure the furnace blower door is fully shut. Put in fresh AAA batteries. Check that the thermostat is snapped onto the wallplate. |
| Heat or AC won’t turn on | Wrong switch position; setpoint too close to room temp | Set SYSTEM to Heat and raise the setpoint above room temp, or to Cool and lower it below. Wait up to 5 minutes for the compressor delay. |
| “Cool On” or “Heat On” keeps flashing | Compressor protection active | Wait 5 minutes. If it’s still flashing after 15 minutes, the problem is in the wiring or the HVAC system, not the thermostat. |
| Can’t set temperature below/above a value | Outside the allowed range | Heat range is 40–90°F. Cool range is 50–99°F. The thermostat won’t accept values outside these. |
| “Heat On” never shows | Setpoint not above room temp; loose W wire | Raise the heat setpoint a few degrees. If still nothing, check that the W (white) wire is seated. |
| “Cool On” never shows | Setpoint not below room temp; outdoor below 50°F | Lower the cool setpoint. Don’t run AC when it’s below 50°F outside. |
| Room temp reading looks off | Sensor still settling after install | Give it 10–15 minutes. The thermostat should be on an interior wall, not in direct sun, near a vent, or on an outside wall. |
| Schedule resets after battery change | Only clock/day memory is volatile | Expected. Re-set the time and day. Your temperatures are still there. |
| “Lo Batt” flashing | Batteries low | Replace both AAA batteries within 60 days. Set SYSTEM to Off first. |
If nothing above fixes it, the issue is almost certainly at the furnace control board, the wiring, or the HVAC equipment itself. Call a licensed HVAC tech at that point.
Specifications
| Model | RTH2510B (7-day); RTH2410B (5-1-1) in same series |
|---|---|
| Programmability | 7 days, 4 periods per day |
| Power | 24 VAC (or 750 mV millivolt systems), backed by 2 AAA batteries |
| Load rating | 1 A @ 24 VAC per output |
| Heat range | 40–90°F (4.5–32°C) |
| Cool range | 50–99°F (10–37°C) |
| System type | Single-stage heat/cool; conventional furnace, millivolt, or heat pump (with or without backup heat, set in Advanced Installation) |
| Compressor delay | 5 minutes minimum |
| Warranty | 1-year limited |
FAQ
Do I need a C-wire?
No. It runs on two AAA batteries. If you have a spare C wire in the wall, just cap it with a wire nut and leave it alone.
How do I reset it to factory defaults?
The manual doesn’t include a dedicated factory-reset button. To clear a custom schedule, press RUN. For a deeper reset, pull the batteries out for several minutes, then re-set the clock and day. For anything more, check the troubleshooting section in the official PDF.
RTH2510B vs RTH2410B, what’s the difference?
RTH2510B lets you set a separate schedule for every day. RTH2410B does weekdays, Saturday, and Sunday as three groups. The wiring and physical hardware are identical.
Why does “Cool On” flash before the AC starts?
Compressor protection. It forces a 5-minute wait after shutdown before the compressor can restart. This prevents short-cycling. It’s normal, not a fault.
Will it work with a heat pump?
Yes, including heat pumps with auxiliary/backup heat strips. The key is you have to enter the Advanced Installation menu (hold Set + Up + Down for 5 seconds) and set Function 1 to 1. Skip that and the backup strips won’t trigger.
How long do the batteries last?
About a year. The “Lo Batt” light starts flashing around 60 days before they’re dead.
This guide is based on the official Honeywell/Resideo RTH2510/RTH2410 documentation (doc numbers 69-2420 and 69-2726). Always shut off the breaker before wiring, and call a licensed HVAC technician if you’re not sure about a step.
Skip to PDF content